Tema
- Ingresamos a:
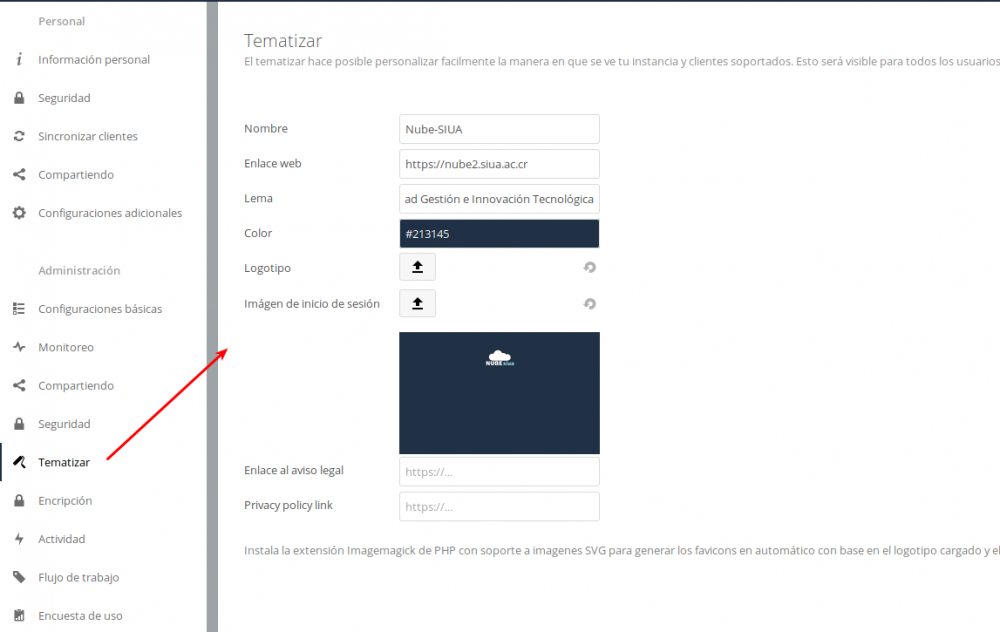
- Para poder generar automáticamente los favicons
«Instala la extensión Imagemagick de PHP con soporte a imagenes SVG para generar los favicons en automático con base en el logotipo cargado y el color. ↗ «
- Instalamos
apt install libmagickwand-dev imagemagick- Reiniciamos apache
service apache2 restartCorreo
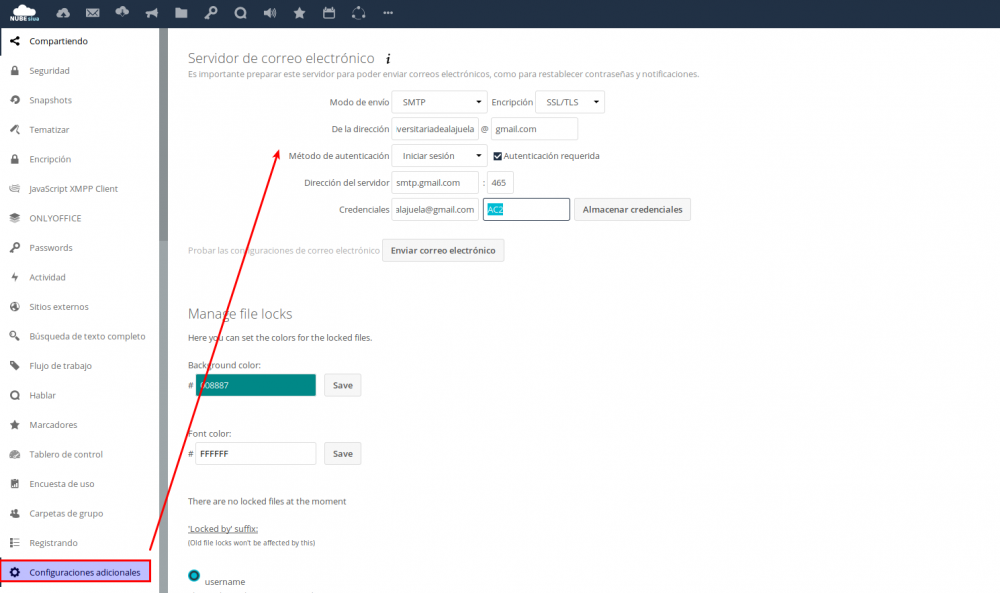
Tamaño de archivos
- Aspectos a considerar:
- En un sistema de 32 bits permite subir archivos < 2GB
- IE6 – IE8: solo permiten subir archivos de <2GB
- IE9 – IE11: solo permiten subir archivos de <4GB
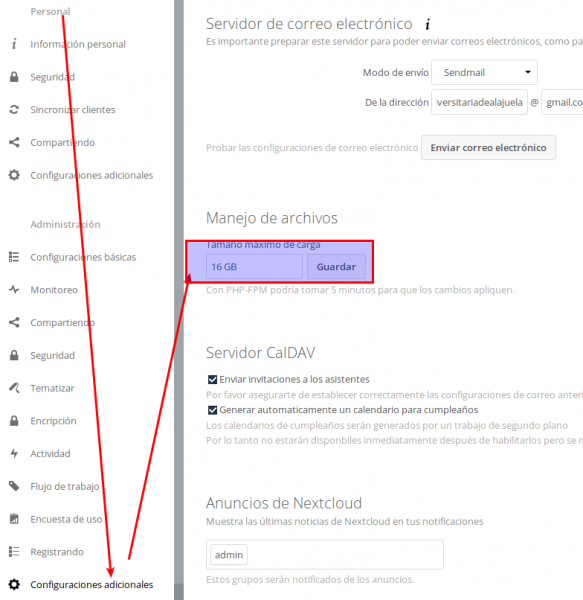
- Para permitir archivos mayores de 15Gb abrimos
nano /etc/php/7.2/apache2/php.ini - Remplazamos
upload_max_filesize = 2M
X
upload_max_filesize = 16G

----------------------------------------------------
post_max_size = 8M
X
post_max_size = 16G
----------------------------------------------------
max_input_time = 60
X
max_input_time = 3600
----------------------------------------------------
max_execution_time = 30
X
max_execution_time = 3600- Ingresamos
Aplicaciones
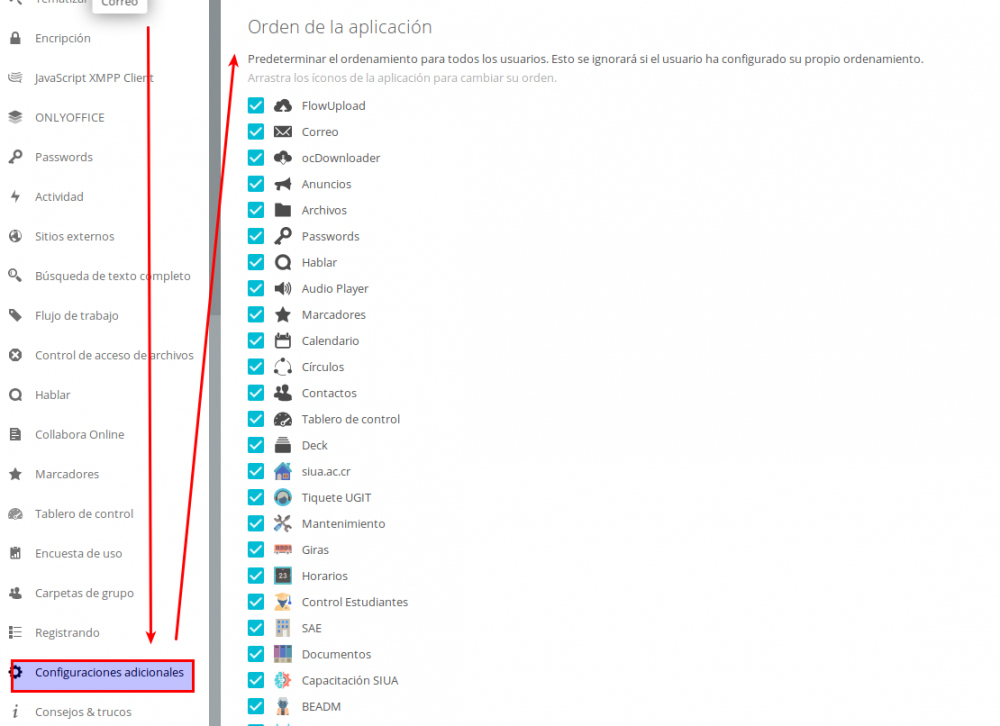
AppOrder:
- Permite ordenar el orden los iconos de las aplicaciones por usuario (Perfil/Configuraciones/Configuraciones Adicionales:PERSONAL) para TODOS: Configuraciones->Administración->Configuración Adicionales
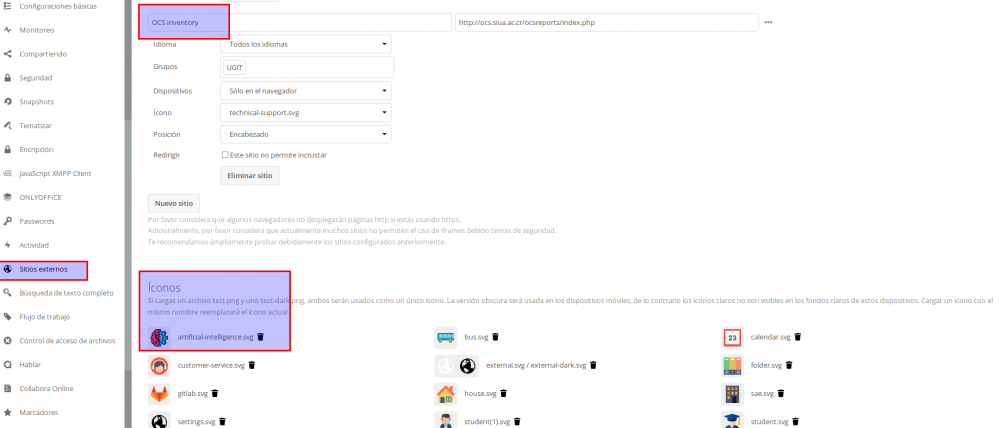
External sites:
- Permite crear enlaces externos (Configuración->Administración->Sitios Externos)
Archivos:
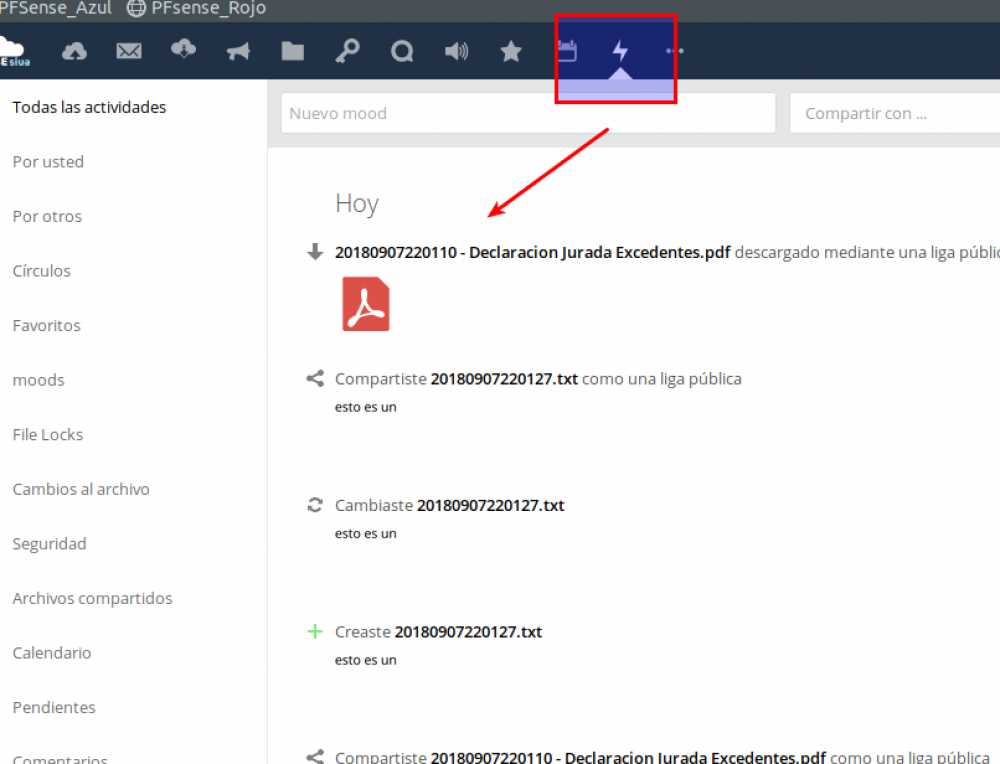
- Activities for shared file downloads: permite ver la actividad en los archivos
Camera RAW Previews:
- Permite ver un preview de fotos RAW
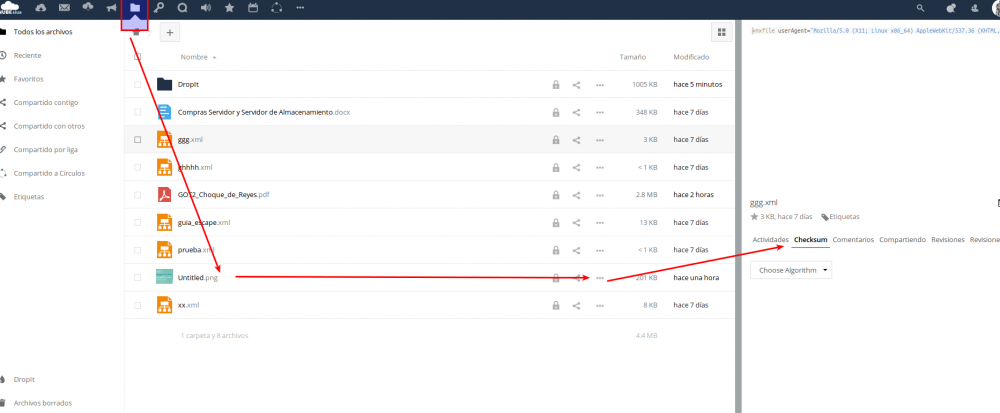
Checksum:
- Permite crear checksum a archivos
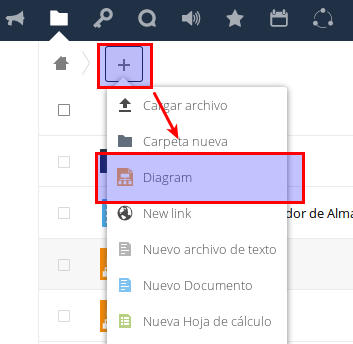
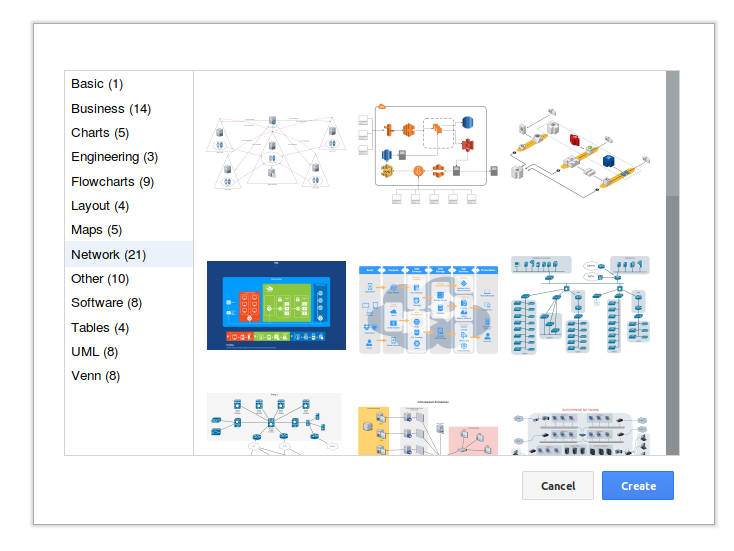
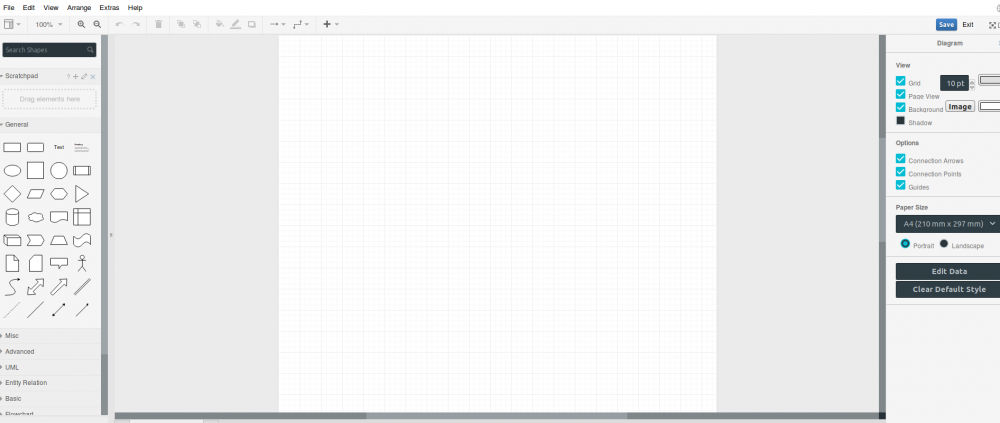
Draw.io:
- Permite hacer diagramas
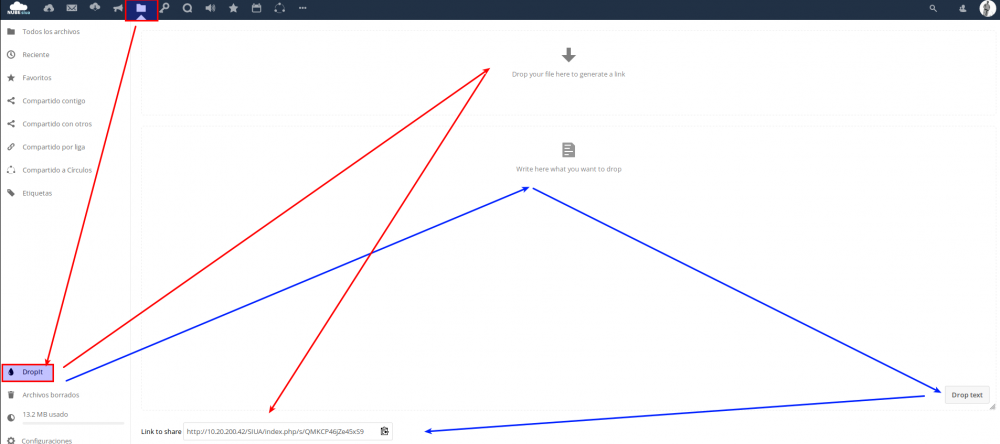
DropIt:
- Permite compartir archivos con texto creando un enlace publico temporal
File access control:
- Permite que UGIT sea el único que pueda subir archivos grandes (Configuración->Administración->Control de acceso de archivos)
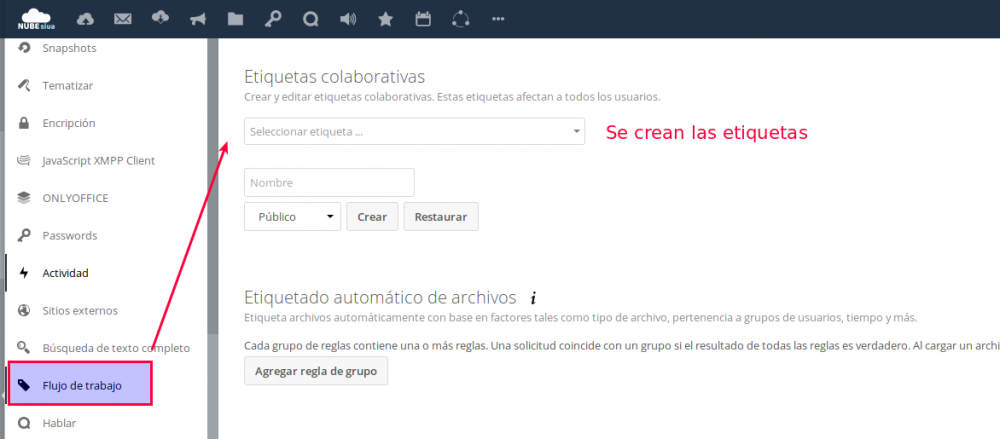
Files automated tagging:
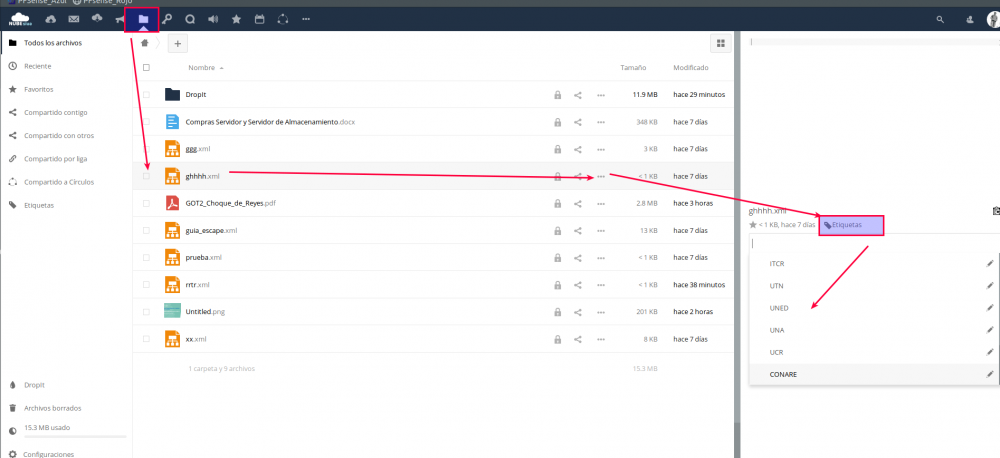
- Permite crear etiquetas (tags) que estarán disponibles para todos los usuarios
- Crear etiquetas:
- Uso de las etiquetas
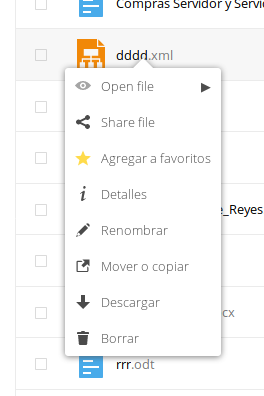
Files Right Click:
- Habilitar el clic derecho sobre los archivos
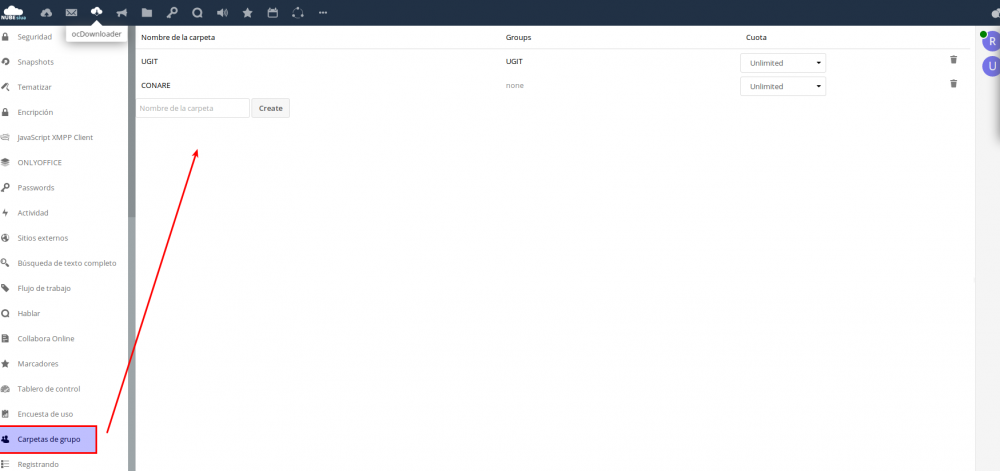
Group folders:
- Para crear carpetas por grupos
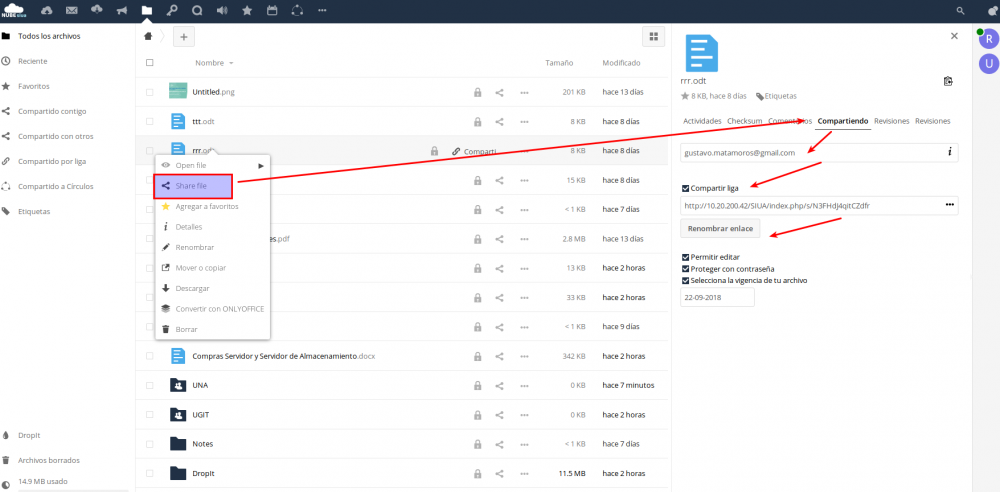
ShareRenamer:
- Permite editar el nombre de un enlace compartido
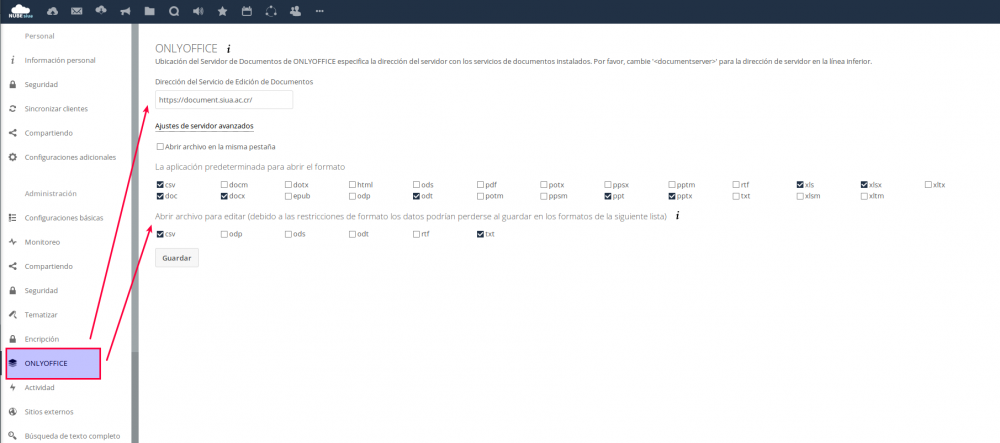
ONLYOFFICE:
- Permite la edición de archivos de oficina

Collabora Online:
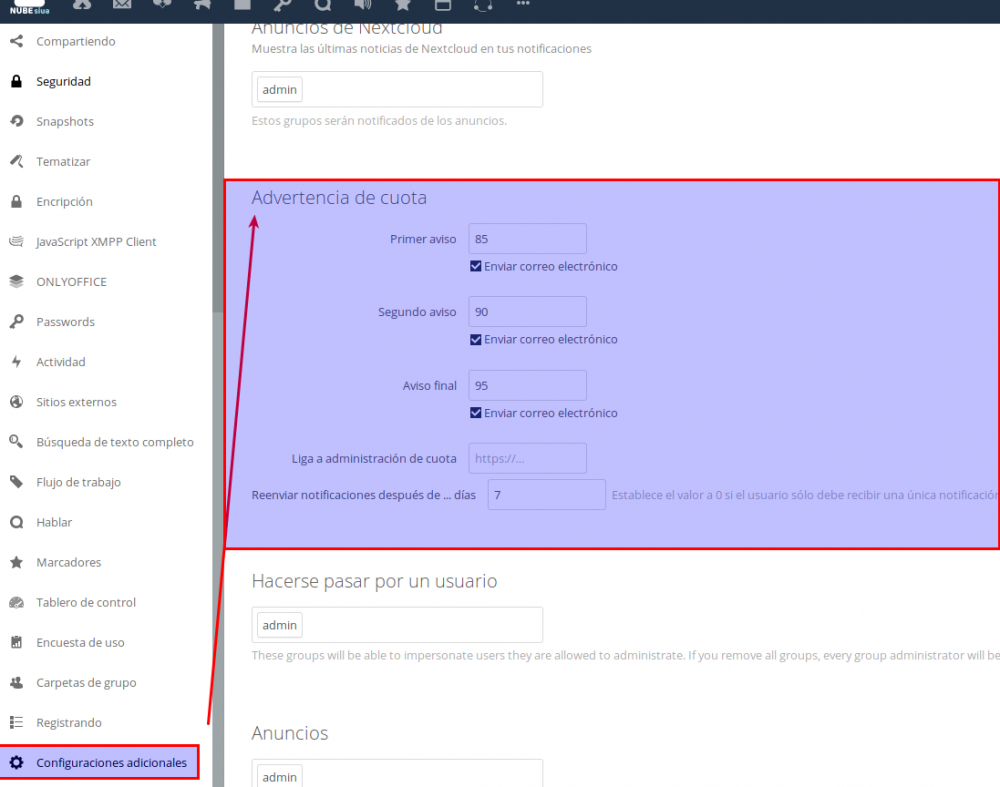
Quota warning:
- Le avisa al usuario cuando se le esta acabando el espacio:
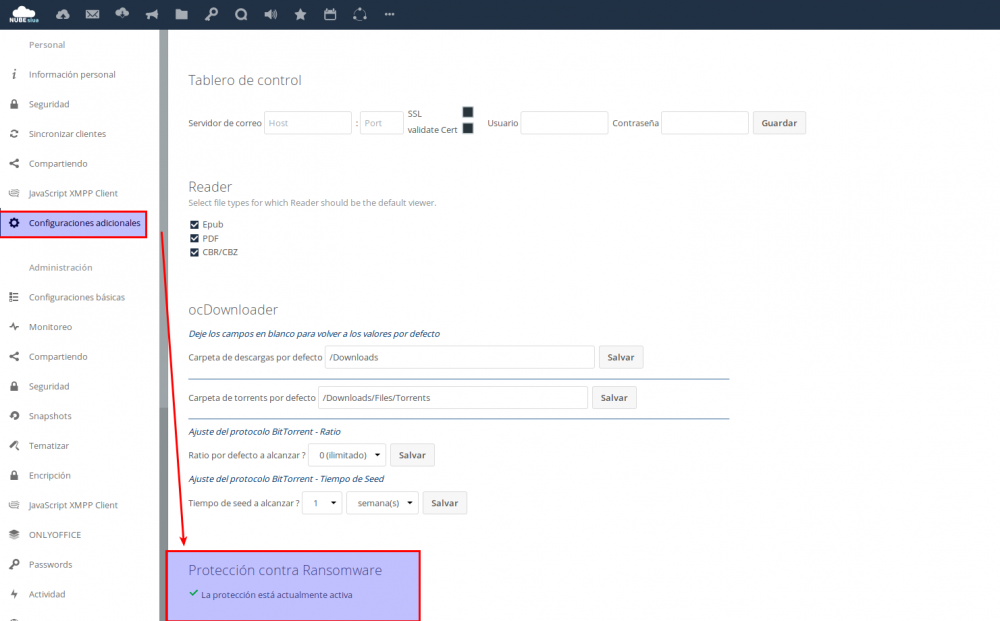
Ransomware
- Protection: protege del virus
Reader (ebook reader):
- Para leer PDF

W2G2:
- Bloquear directorios y archivos de un usuario cuando es compartido por otro

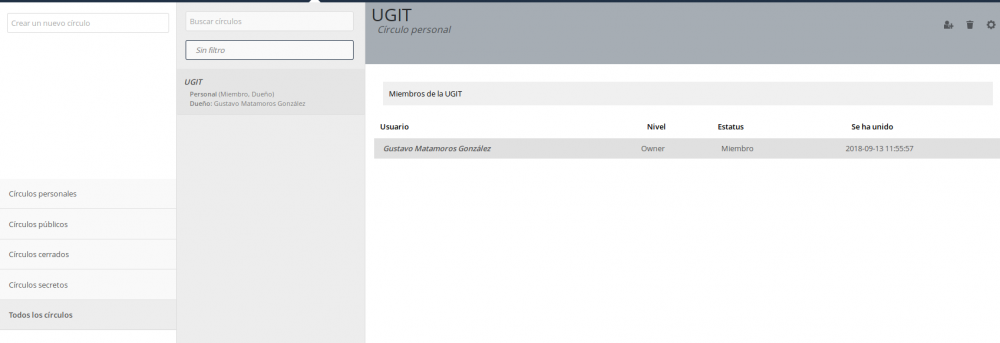
Circles:
- Permite crear grupos personalizado por usuarios
Admin notifications:
- Sección para crear anuncios
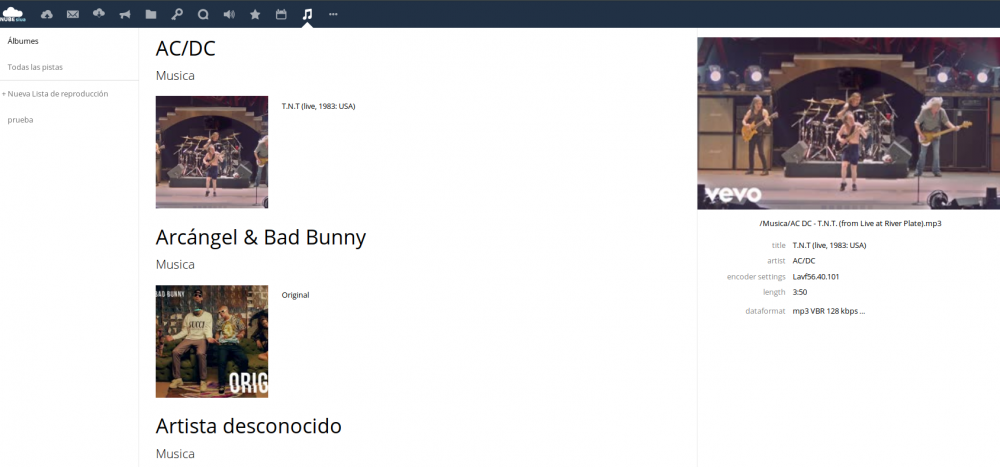
Audio Player:
- Reproductor de música

Music
- Reproductor de música.
Calendar:

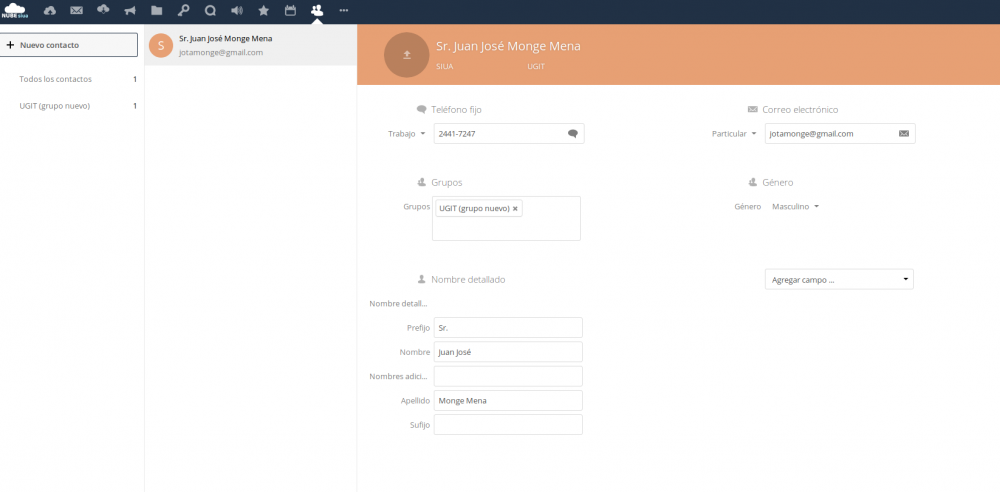
Contacts:
- Lista de contactos
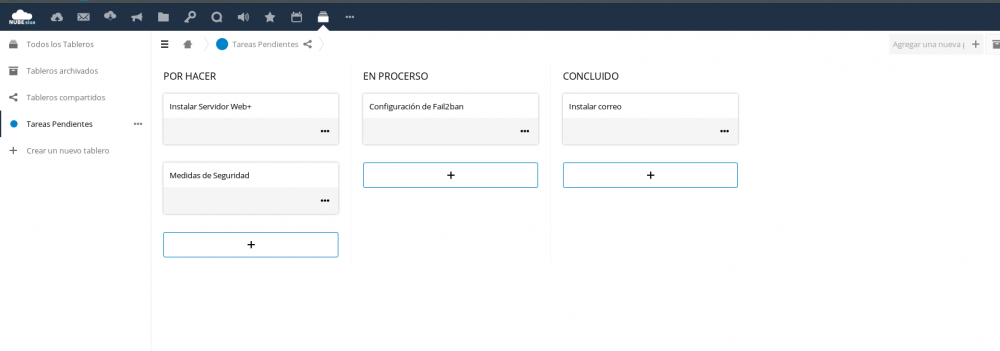
Deck:
- Tabla kanban
Mail:
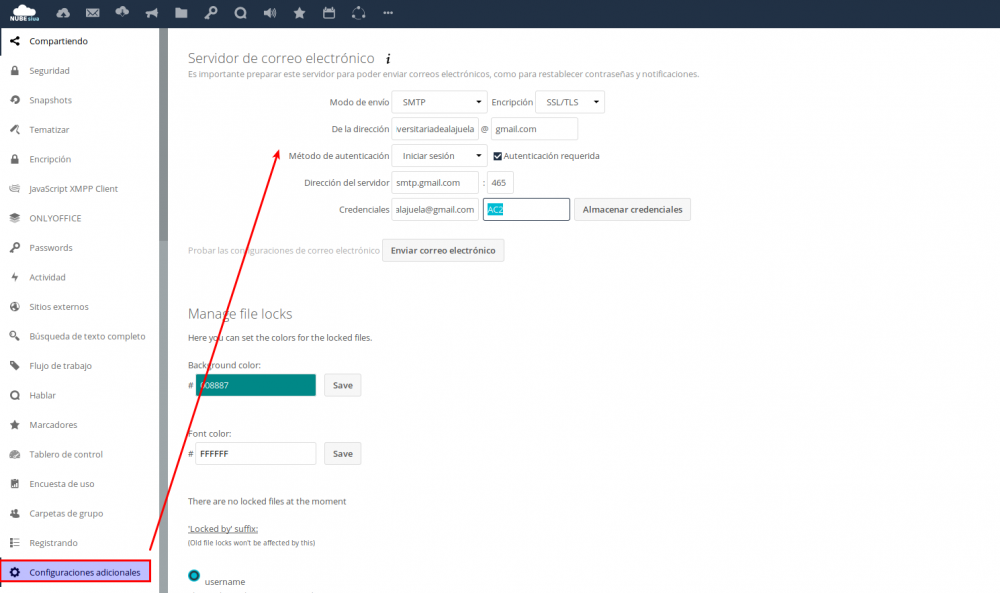
- Para permitir acceso de gmail, debemos ingresar a
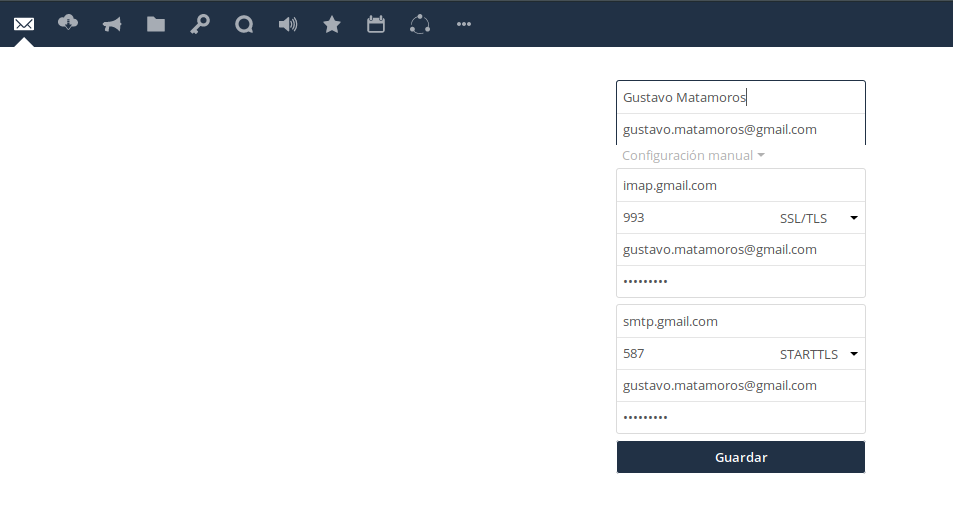
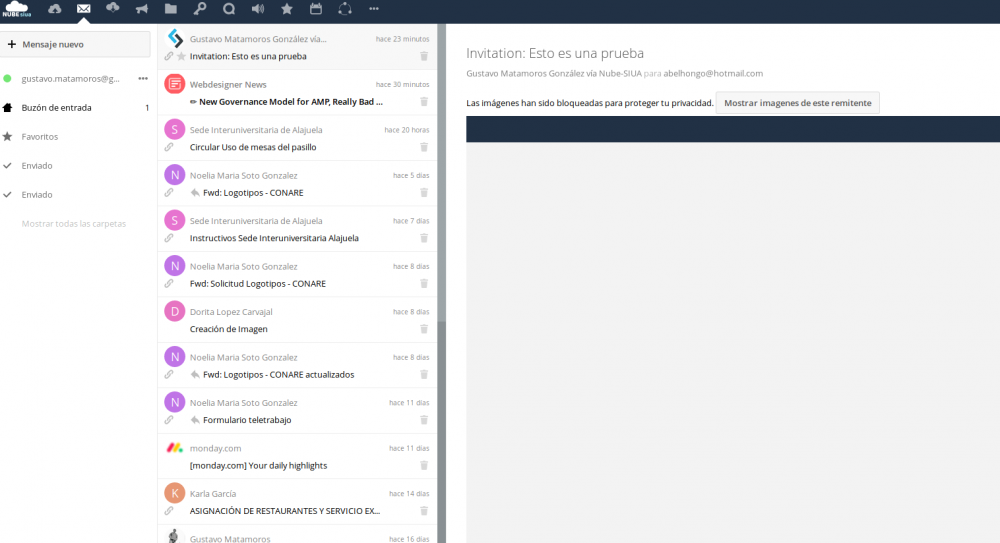
https://myaccount.google.com/lesssecureapps?pli=1- Luego introducir los datos
Markdown Editor:
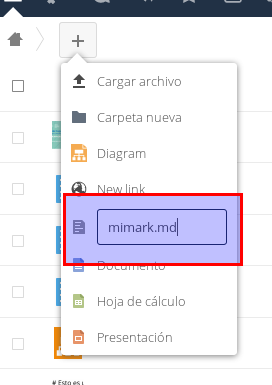
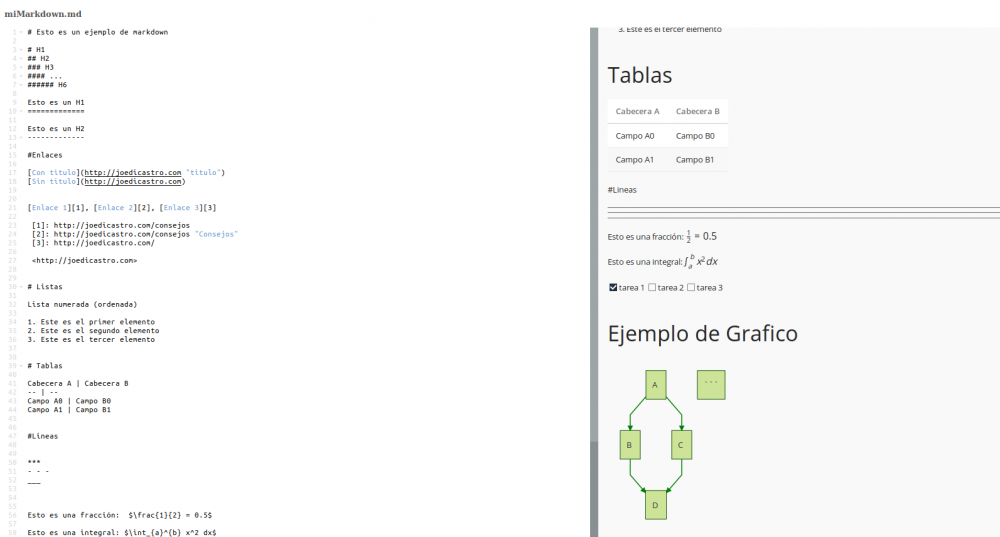
- Permite crear archivos markdown, solo se tiene que hacer el archivo extensión «.md» o «.markdown»
Mindmaps:
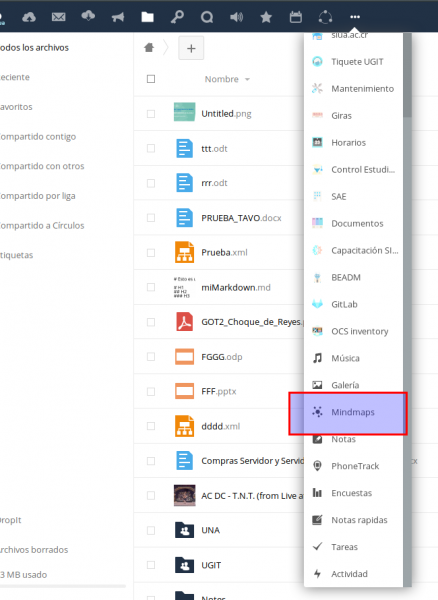
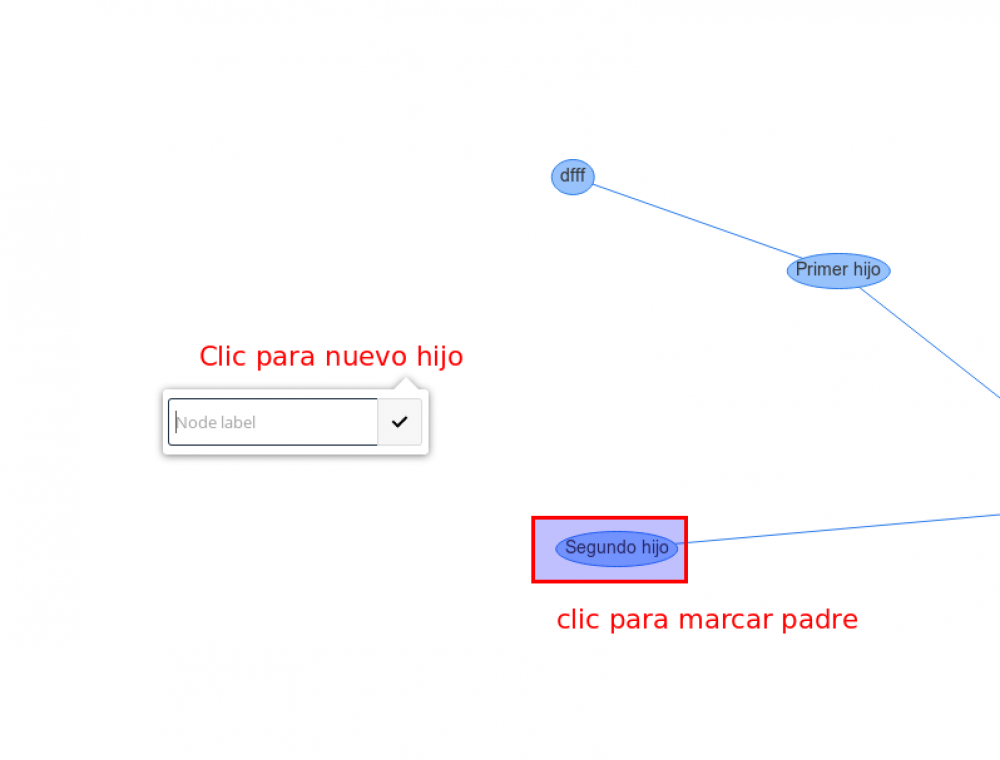
- Mapas mentales
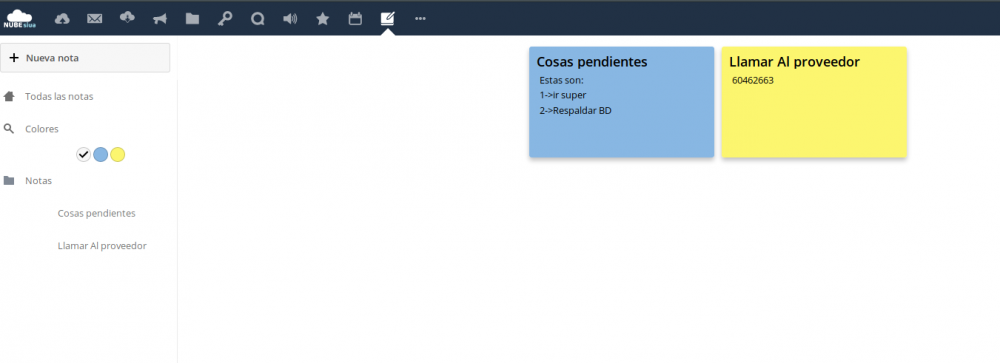
Notes:
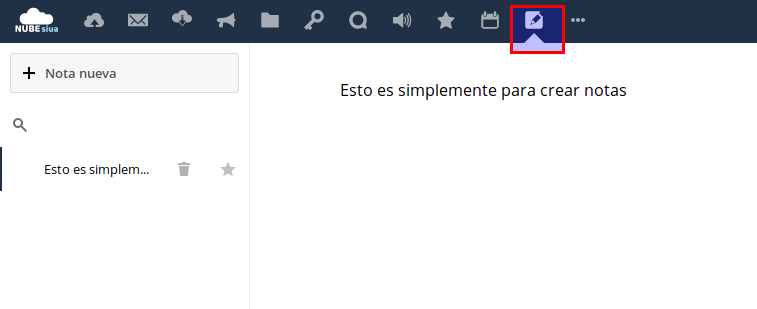
Quick notes
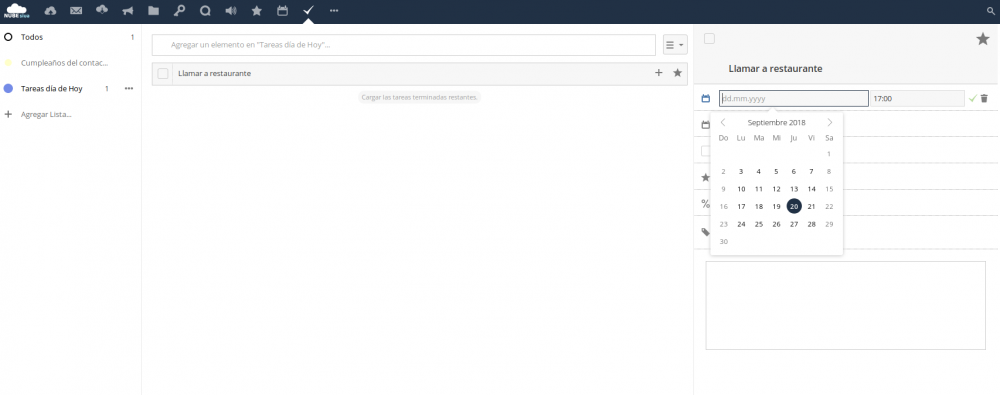
Tasks
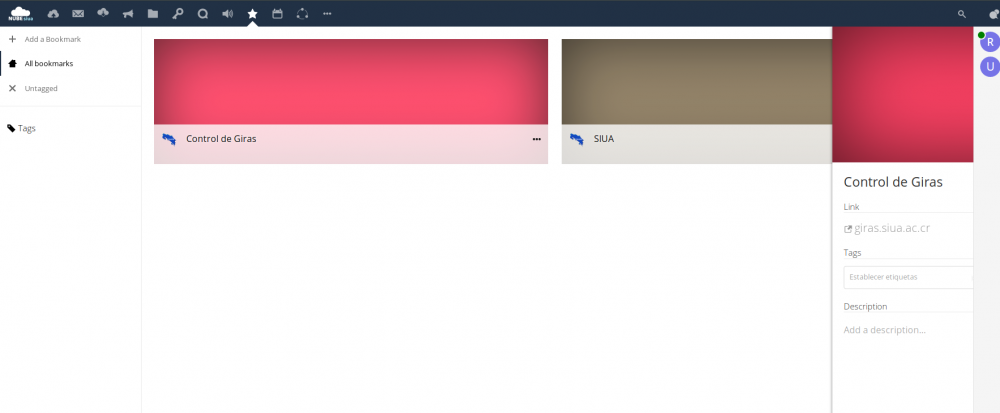
Bookmarks
- Permite almacenar URL’s
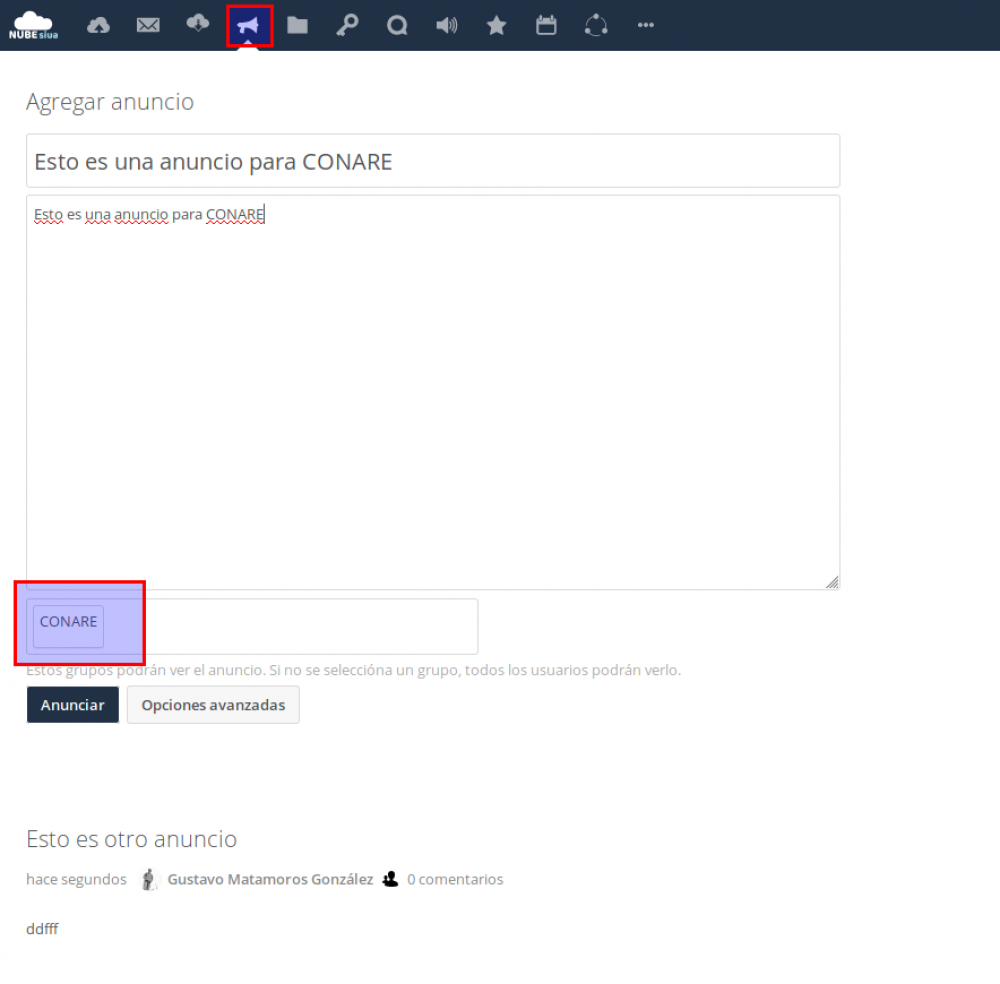
Announcement center
- Permite al administrador crear anuncios según grupos
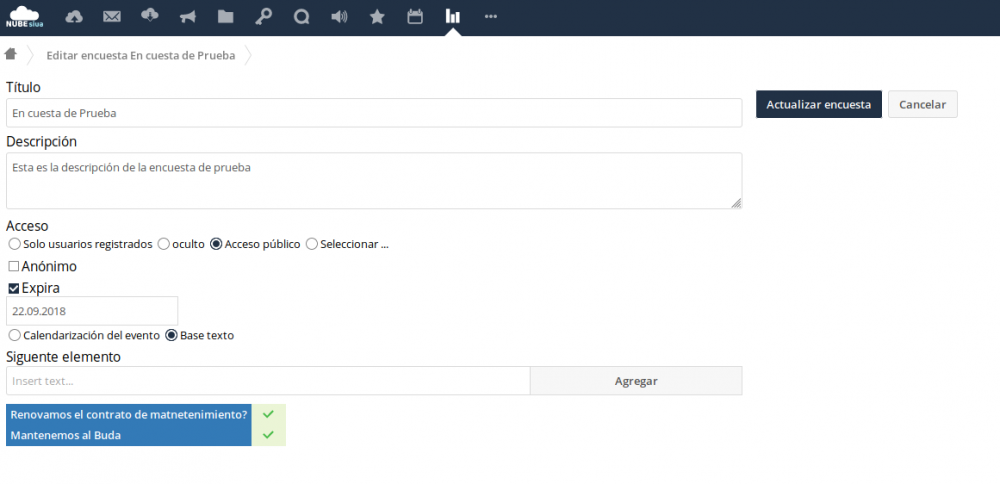
Polls:
- Permite crear encuestas de Si /No

Full text search
Buscar: (https://fribeiro.org/tech/2018/02/07/nextcloud-full-text-elasticsearch/)
- Full text search
- Full text search – Bookmarks
- Full text search – Elasticsearch Platform
- Full text search – Files
- Instalamos dependencias
sudo apt install apt-transport-https ca-certificates- Instalamos java 10 https://www.linuxuprising.com/2018/04/install-oracle-java-10-jdk-10-in-debian.html
su - echo "deb http://ppa.launchpad.net/linuxuprising/java/ubuntu bionic main" | tee /etc/apt/sources.list.d/linuxuprising-java.list apt-key adv --keyserver hkp://keyserver.ubuntu.com:80 --recv-keys 73C3DB2A
apt-get update apt-get install oracle-java10-installer
exit- Lo hacemos defecto
su - apt-get install oracle-java10-set-default exit- Verificamos la versión
java -version- Instalar elasticsearch
- Agregamos la llave
wget -qO - https://artifacts.elastic.co/GPG-KEY-elasticsearch | sudo apt-key add -- Agregamos el repositorio
echo "deb https://artifacts.elastic.co/packages/6.x/apt stable main" | sudo tee -a /etc/apt/sources.list.d/elastic-6.x.list- Instalamos
sudo apt update && sudo apt install elasticsearch- Habilitamos el servicio
sudo systemctl daemon-reload sudo systemctl enable elasticsearch sudo systemctl start elasticsearch- Instalamos el plugin «ingest-attachment»
sudo /usr/share/elasticsearch/bin/elasticsearch-plugin install ingest-attachment- RESULTADO
-> Downloading ingest-attachment from elastic
[=================================================] 100%
@@@@@@@@@@@@@@@@@@@@@@@@@@@@@@@@@@@@@@@@@@@@@@@@@@@@@@@@@@@
@ WARNING: plugin requires additional permissions @
@@@@@@@@@@@@@@@@@@@@@@@@@@@@@@@@@@@@@@@@@@@@@@@@@@@@@@@@@@@
* java.lang.RuntimePermission accessClassInPackage.sun.java2d.cmm.kcms
* java.lang.RuntimePermission accessDeclaredMembers
* java.lang.RuntimePermission getClassLoader
* java.lang.reflect.ReflectPermission suppressAccessChecks
* java.security.SecurityPermission createAccessControlContext
* java.security.SecurityPermission insertProvider
* java.security.SecurityPermission putProviderProperty.BC
See http://docs.oracle.com/javase/8/docs/technotes/guides/security/permissions.html
for descriptions of what these permissions allow and the associated risks.

Continue with installation? [y/N]y
-> Installed ingest-attachment- Abrimos el archivo
nano /etc/elasticsearch/elasticsearch.yml- Y lo modificamos para que solo se pueda acceder de forma localhost, modificamos
#network.host: 192.168.0.1
X
network.host: 127.0.0.1 - Reiniciamos el servicio
sudo systemctl restart elasticsearch- Probamos que el servicio este corriendo
curl -XGET 'localhost:9200/?pretty'- RESULTADO
{
"name" : "JMqFCeK",
"cluster_name" : "elasticsearch",
"cluster_uuid" : "bzfg8UyQSVeVUZuxiXgtIQ",
"version" : {
"number" : "6.4.1",
"build_flavor" : "default",
"build_type" : "deb",
"build_hash" : "e36acdb",
"build_date" : "2018-09-13T22:18:07.696808Z",
"build_snapshot" : false,
"lucene_version" : "7.4.0",
"minimum_wire_compatibility_version" : "5.6.0",
"minimum_index_compatibility_version" : "5.0.0"
},
"tagline" : "You Know, for Search"
}- Configuramos en nextcloud
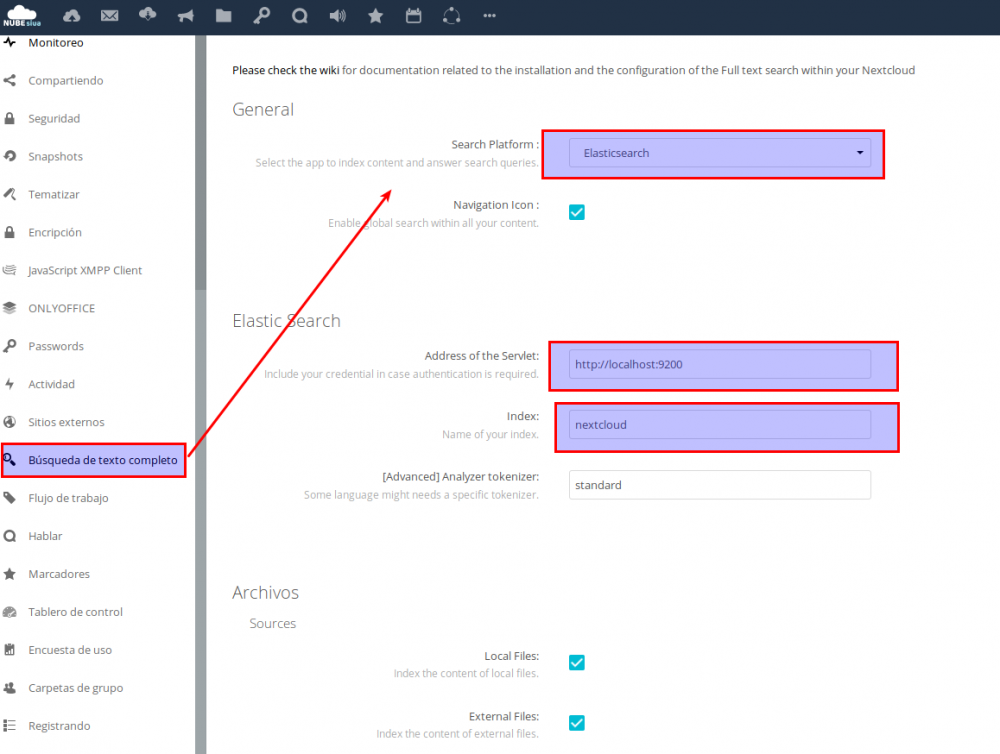
- Ejecutamos el primer index
sudo -u www-data php /var/www/html/SIUA/occ fulltextsearch:indexJavaScript XMPP Chat:
Instalación de ejabberd
- Actualizamos el sistema
apt update && apt upgrade- Instalamos dependencias
apt install dirmngr apt-transport-https- Agregamos repositorio
echo deb http://http.debian.net/debian stretch-backports main > /etc/apt/sources.list- Agregamos la llave
apt-key adv --keyserver keyserver.ubuntu.com --recv-keys 8B48AD6246925553- Agregamos repositorio de jsxc
echo deb https://dl.jsxc.org stable main > /etc/apt/sources.list.d/jsxc.list- Obtenemos la llave
wget -qO - https://dl.jsxc.org/archive.key | apt-key add -- Actualizamos
apt update- Instalar
wget http://ugit.blog.siua.ac.cr/Archivos/nextcloud/ejabberd_18.09-0_amd64.deb
dpkg -i ejabberd_18.09-0_amd64.deb- instalamos dependencias
apt install apache2 libapache2-mod-php php-gd php-json php-sqlite3 php-curl php-mbstring php-intl php-imagick php-xml php-zip- Python
wget http://ugit.blog.siua.ac.cr/Archivos/nextcloud/python3-bsddb3_6.1.0-1+b2_amd64.deb
dpkg -i python3-bsddb3_6.1.0-1+b2_amd64.deb
wget http://ugit.blog.siua.ac.cr/Archivos/nextcloud/python3-bcrypt_3.1.2-1_amd64.deb
dpkg -i python3-bcrypt_3.1.2-1_amd64.deb
Instalar XCAUTH
- Agregamos el repositorio
echo deb https://dl.jsxc.org stable main > /etc/apt/sources.list.d/jsxc.list- Agregamos la llave
wget -qO - https://dl.jsxc.org/archive.key | apt-key add -- Actualizamos
apt update- Instalamos
apt install xcauth- Configuramos
chown xcauth:xcauth /etc/xcauth.conf
chmod 660 /etc/xcauth.conf- Modificamos el archivo
nano /etc/apache2/sites-available/nube.siua.ac.cr-le-ssl.conf- Agregamos
ProxyPass /http-bind/ http://localhost:5280/http-bind/
ProxyPassReverse /http-bind/ http://localhost:5280/http-bind/
ProxyPreserveHost On- Ademas
Alias /nextcloud "/var/www/SIUA/"

<Directory /var/www/SIUA/>
Options +FollowSymlinks
AllowOverride All

<IfModule mod_dav.c>
Dav off
</IfModule>

SetEnv HOME /var/www/SIUA
SetEnv HTTP_HOME /var/www/SIUA
</Directory>- Reiniciamos apache
service apache2 reload- Creamos el archivo
nano /etc/apache2/sites-available/userdata.conf- Contenido
<VirtualHost *:80>
ServerName userdata.nube.siua.ac.cr
# Mostly to satisfy certbot
ServerAlias conference.nube.siua.ac.cr pubsub.nube.siua.ac.cr
# This DocumentRoot is irrelevant, but match ejabberd.conf anyway
DocumentRoot /var/www/userdata
ErrorLog ${APACHE_LOG_DIR}/userdata_error.log
CustomLog ${APACHE_LOG_DIR}/userdata_access.log combined
ProxyPass / http://localhost:5288/
ProxyPassReverse / http://localhost:5288/
ProxyPreserveHost On
</VirtualHost>- Ejecutamos
mkdir --mode=660 /var/www/userdata
chown ejabberd:ejabberd /var/www/userdata
a2enmod headers env dir mime proxy proxy_http
a2ensite userdata- Reiniciamos
systemctl reload apache2- Creamos certificado
certbot --installer apache- Resultado
Saving debug log to /var/log/letsencrypt/letsencrypt.log

How would you like to authenticate with the ACME CA?
-------------------------------------------------------------------------------
1: Apache Web Server plugin - Beta (apache)
2: Spin up a temporary webserver (standalone)
3: Place files in webroot directory (webroot)
-------------------------------------------------------------------------------
Select the appropriate number [1-3] then [enter] (press 'c' to cancel): 1
Plugins selected: Authenticator apache, Installer apache

Which names would you like to activate HTTPS for?
-------------------------------------------------------------------------------
1: nube.siua.ac.cr
2: conference.nube.siua.ac.cr
3: pubsub.nube.siua.ac.cr
4: userdata.nube.siua.ac.cr
5: www.nube.siua.ac.cr
-------------------------------------------------------------------------------
Select the appropriate numbers separated by commas and/or spaces, or leave input
blank to select all options shown (Enter 'c' to cancel): 2 3 4
Obtaining a new certificate
Performing the following challenges:
http-01 challenge for conference.nube.siua.ac.cr
http-01 challenge for pubsub.nube.siua.ac.cr
http-01 challenge for userdata.nube.siua.ac.cr
Waiting for verification...
Cleaning up challenges
Created an SSL vhost at /etc/apache2/sites-available/userdata-le-ssl.conf
Deploying Certificate to VirtualHost /etc/apache2/sites-available/userdata-le-ssl.conf
Enabling available site: /etc/apache2/sites-available/userdata-le-ssl.conf
Deploying Certificate to VirtualHost /etc/apache2/sites-available/userdata-le-ssl.conf
Deploying Certificate to VirtualHost /etc/apache2/sites-available/userdata-le-ssl.conf

Please choose whether or not to redirect HTTP traffic to HTTPS, removing HTTP access.
-------------------------------------------------------------------------------
1: No redirect - Make no further changes to the webserver configuration.
2: Redirect - Make all requests redirect to secure HTTPS access. Choose this for
new sites, or if you're confident your site works on HTTPS. You can undo this
change by editing your web server's configuration.
-------------------------------------------------------------------------------
Select the appropriate number [1-2] then [enter] (press 'c' to cancel): 2
Redirecting vhost in /etc/apache2/sites-enabled/userdata.conf to ssl vhost in /etc/apache2/sites-available/userdata-le-ssl.conf

-------------------------------------------------------------------------------
Congratulations! You have successfully enabled
https://conference.nube.siua.ac.cr, https://pubsub.nube.siua.ac.cr, and
https://userdata.nube.siua.ac.cr

You should test your configuration at:
https://www.ssllabs.com/ssltest/analyze.html?d=conference.nube.siua.ac.cr
https://www.ssllabs.com/ssltest/analyze.html?d=pubsub.nube.siua.ac.cr
https://www.ssllabs.com/ssltest/analyze.html?d=userdata.nube.siua.ac.cr
-------------------------------------------------------------------------------
IMPORTANT NOTES:
 - Congratulations! Your certificate and chain have been saved at:
 /etc/letsencrypt/live/conference.nube.siua.ac.cr/fullchain.pem
 Your key file has been saved at:
 /etc/letsencrypt/live/conference.nube.siua.ac.cr/privkey.pem
 Your cert will expire on 2019-01-09. To obtain a new or tweaked
 version of this certificate in the future, simply run certbot again
 with the "certonly" option. To non-interactively renew *all* of
 your certificates, run "certbot renew"
 - If you like Certbot, please consider supporting our work by:

 Donating to ISRG / Let's Encrypt: https://letsencrypt.org/donate
Donating to EFF: https://eff.org/donate-le- Ejecutamos
chgrp -R ssl-cert /etc/letsencrypt/{archive,live}
chmod -R g+rX,o-rwx /etc/letsencrypt/{archive,live}
systemctl start apache2- Copiar archivo de configuración de ejemplo
cp /etc/ejabberd/ejabberd.yml-xcauth-example /etc/ejabberd/ejabberd.yml- Remplazamos el SERVERNAME X nube.siua.ac.cr
hosts:
  - "SERVERNAME"

X

hosts:
- "nube.siua.ac.cr"- Ingresamos ala configuración de nextcloud y activamos
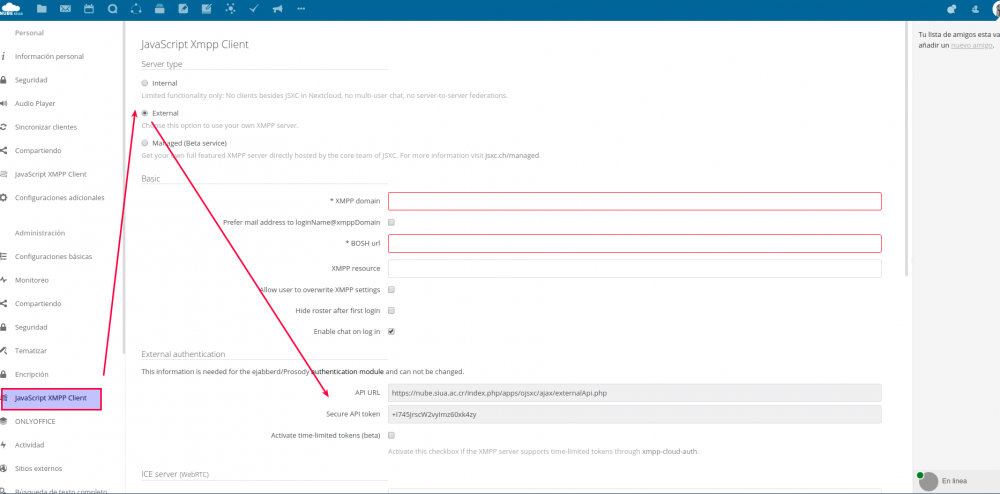
- Abrimos el archivo
nano /etc/xcauth.conf- Modificamos
#type=ejabberd
X
type=ejabberd
-------------------------------------
type=generic
X
#type=generic
-------------------------------------
#secret=0123456789ABCDEF
X
#secret=0123456789ABCDEFfddsfsdfdsf
-------------------------------------
#url=https://example.org/index.php/apps/ojsxc/ajax/externalApi.php
X
#url=https://example.org/index.php/apps/ojsxc/ajax/externalApi.php
-------------------------------------
#ejabberdctl=/usr/sbin/xcejabberdctl
X
ejabberdctl=/usr/sbin/xcejabberdctl- Ejecutamos
chown -R xcauth:xcauth /etc/xcauth.conf /var/{lib,log}/xcauth
chmod 640 /etc/xcauth.conf
xcrestart
adduser ejabberd ssl-cert
openssl dhparam -out /etc/ejabberd/dhparams.pem 2048
service ejabberd restart- Otos comandos
service ejabberd restart

openssl s_client -connect localhost:5222 -starttls xmpp

https://docswiki.newro.co/index.php/Nextcloud_ejabberd

/opt/xmpp-cloud-auth/xcauth.py -d -A gmatamor nube.siua.ac.cr Sheska1983
letsencrypt -d nube.siua.ac.cr -d userdata.nube.siua.ac.cr -d conference.nube.siua.ac.cr -d pubsub.nube.siua.ac.cr -m interuniversitariadealajuela@gmail.com --redirect --hsts --uir --staple-ocsp
APACHE
- https://github.com/jsxc/jsxc/wiki/Prepare-apache
- Preparamos apache
a2enmod proxy
a2enmod proxy_http- Reiniciamos apache
systemctl restart apache2- Abrimos el archivo
nano /etc/apache2/sites-available/nube.siua.ac.cr-le-ssl.conf- Agregamos al final
ProxyPass /http-bind/ http://localhost:5280/http-bind/
ProxyPassReverse /http-bind/ http://localhost:5280/http-bind/- Reiniciamos apache
service apache2 reload- Instalamos ejabberd
- Actualizamos el sistema
apt-get update- Instalamos
apt-get install ejabberd- Agregamos el usuario a www-data
adduser ejabberd www-data- Le damos permisos al grupo
chmod -R g+w /var/www/html/SIUA/Social Sharing
- Social sharing via email
- Social sharing via Facebook
- Social sharing via Google+
- Social sharing via Twitter
Can I update:
- Verifica si todas las aplicaciones son compatibles con la actualización de nextcloud
Data Request:
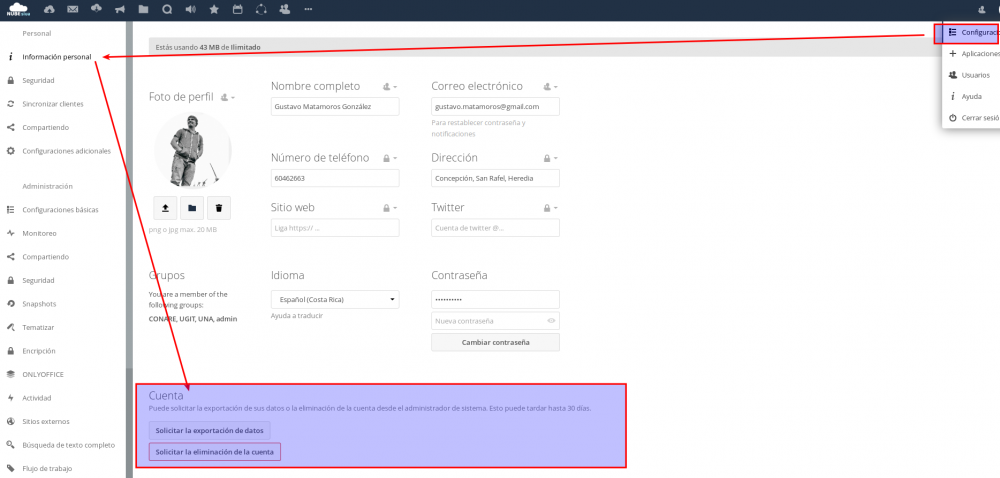
- Les permite a los usuarios solicitar la eliminación de la cuenta
Flow Upload:
- Permite subir varios archivos a la vez y un mejor control

ocDownloader:
- Permite la descarga de archivos HTTP FTP YOUTUBE BITTORRENT
- Instalación:
- Dependencias
apt-get install aria2 curl php-curl- Configuramos:
mkdir /var/log/aria2c /var/local/aria2c touch /var/log/aria2c/aria2c.log touch /var/local/aria2c/aria2c.sess
chown www-data.www-data -R /var/log/aria2c /var/local/aria2c
chmod 770 -R /var/log/aria2c /var/local/aria2c
sudo -u www-data aria2c --enable-rpc --rpc-allow-origin-all -c -D --log=/var/log/aria2c/aria2c.log --check-certificate=false --save-session=/var/local/aria2c/aria2c.sess --save-session-interval=2 --continue=true --input-file=/var/local/aria2c/aria2c.sess --rpc-save-upload-metadata=true --force-save=true --log-level=warn- Para youtube (https://rg3.github.io/youtube-dl/download.html)
sudo curl -L https://yt-dl.org/downloads/latest/youtube-dl -o /usr/local/bin/youtube-dl
sudo chmod a+rx /usr/local/bin/youtube-dl - Para configurar la carpeta donde se descargan los archivos:
Sensor Logger:
- permite mantener sensores
Otras Configuraciones
- Seguridad->Políticas de contraseñas

Configuración del archivo de configuración
- Respaldamos el archivo
cp /var/www/html/SIUA/config/config.php /var/www/html/SIUA/config/config.php.bak.ugit- Establecemos el idioma defecto
'default_language' => 'es',- Establecemos la aplicación por defecto al ingresar
'defaultapp' => 'files',- Ocultamos la ayuda de nextcloud
'knowledgebaseenabled' => false,- Establecemos que el usuario puede modificar sus datos
'allow_user_to_change_display_name' => true,- Establecemos 24 horas de vida para una session sin actividad
'session_lifetime' => 60 * 60 * 24,Error CSS image app-icon filter
- En Tematizar->Custom CSS (solo sirve cuando son iconos blanco/gris)
#navigation .app-icon {
filter: none !important;
-moz-filter: none  !important;
-webkit-filter: none !important;
}
HTTPS:
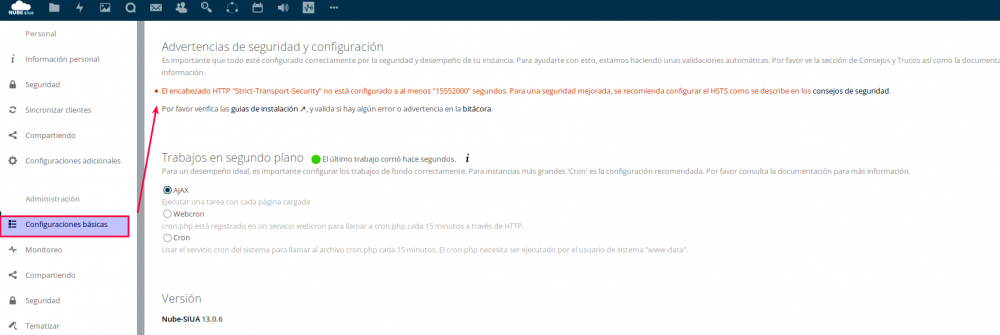
- ERROR: Después de establecer el protocolo HTTPS en
- Abrimos el archivo
nano /etc/apache2/sites-available/nube.siua.ac.cr-le-ssl.conf- Agregamos
  #************************************************************************
#********************** DATOS DEL WEBMASTER *****************************
#************************************************************************
ServerAdmin interuniversitariadealajuela@gmail.com
Header add Author "Unidad de Gestion e Innovacion Tecnologica"
Header always set Strict-Transport-Security "max-age=15552000; includeSubDomains"- Recargamos apache
service apache2 reloadReescribir la dirección en el archivo de configuración:
- Buscamos y remplazamos
'overwrite.cli.url' => 'http://10.20.200.42/SIUA',
X
'overwrite.cli.url' => 'https://nube.siua.ac.cr',
Instalación de COTOURN
- https://www.voztovoice.org/?q=node/828
- Instalamos dependencias
apt --fix-broken install
apt-get install libssl-dev libevent-dev- Ingresamos la carpeta
cd /tmp- Instalamos dependencias
wget https://github.com/libevent/libevent/releases/download/release-2.0.22-stable/libevent-2.0.22-stable.tar.gz- Instalamos
tar xvfz libevent-2.0.22-stable.tar.gz
cd libevent-2.0.22-stable
./configure
make
make install- Salimos
cd ..- Descargamos el archivo
wget http://http.debian.net/debian/pool/main/c/coturn/coturn_4.5.0.5.orig.tar.gz- Instalamos el programa
dpkg -i coturn_4.5.0.5-1+b1_amd64.deb- Descomprimimos
tar -xf coturn_4.5.0.5.orig.tar.gz- Instalamos
cd turnserver-4.5.0.5/
mkdir -p /opt/coturn
./configure --prefix=/opt/coturn
make
make install- RESULTADO:
1) If you system supports automatic start-up system daemon services,
the, to enable the turnserver as an automatically started system
service, you have to:

a) Create and edit /etc/turnserver.conf or
/usr/local/etc/turnserver.conf .
Use /usr/local/etc/turnserver.conf.default as an example.

b) For user accounts settings: set up SQLite or PostgreSQL or
MySQL or MongoDB or Redis database for user accounts.
Use /usr/local/share/turnserver/schema.sql as SQL database schema,
or use /usr/local/share/turnserver/schema.userdb.redis as Redis
database schema description and/or
/usr/local/share/turnserver/schema.stats.redis
as Redis status & statistics database schema description.

If you are using SQLite, the default database location is in
/var/db/turndb or in /usr/local/var/db/turndb or in /var/lib/turn/turndb.

c) add whatever is necessary to enable start-up daemon for the
/usr/local/bin/turnserver.

2) If you do not want the turnserver to be a system service,
then you can start/stop it "manually", using the "turnserver"
executable with appropriate options (see the documentation).

3) To create database schema, use schema in file
/usr/local/share/turnserver/schema.sql.

4) For additional information, run:

$ man turnserver
$ man turnadmin
$ man turnutils- Creamos el archivo
nano /opt/coturn/etc/turnserver.conf- Agregamos
Calendario con Gmail
- Para móvil
Instalar Cliente LINUX
- Agregamos el repositorio
sudo add-apt-repository ppa:nextcloud-devs/client- Actualizamos
apt update- Instalamos
sudo apt install nextcloud-client