- Actualizamos
sudo apt update && sudo apt upgrade -y
apt autoremove- Dependencias
sudo apt install wget unzip curl software-properties-common gnupg2 -yJDK 17
- Instalación JDK 17
sudo apt install openjdk-17-jdk -y
java -version- Resultado
openjdk version "17.0.13" 2024-10-15
OpenJDK Runtime Environment (build 17.0.13+11-Debian-2deb12u1)
OpenJDK 64-Bit Server VM (build 17.0.13+11-Debian-2deb12u1, mixed mode, sharing)
TOMCAT 10
- Instalamos
cd /tmp
wget https://dlcdn.apache.org/tomcat/tomcat-10/v10.1.33/bin/apache-tomcat-10.1.33.tar.gz -O tomcat.tar.gz
sudo mkdir -p /opt/tomcat
sudo tar -xvzf tomcat.tar.gz -C /opt/tomcat --strip-components=1- permisos
sudo chmod +x /opt/tomcat/bin/*.sh- Crear servicio
sudo nano /etc/systemd/system/tomcat.service- Agregamos
[Unit]
Description=Tomcat 10 Service
After=network.target

[Service]
Type=forking
User=tomcat
Group=tomcat
Environment="JAVA_HOME=/usr/lib/jvm/java-17-openjdk-amd64"
Environment="CATALINA_PID=/opt/tomcat/temp/tomcat.pid"
Environment="CATALINA_HOME=/opt/tomcat"
Environment="CATALINA_BASE=/opt/tomcat"
ExecStart=/opt/tomcat/bin/startup.sh
ExecStop=/opt/tomcat/bin/shutdown.sh

[Install]
WantedBy=multi-user.target- Crear grupo y usuario tomcat
sudo groupadd tomcat
sudo useradd -r -s /bin/false -g tomcat tomcat- permisos y dueño
sudo chown -R tomcat:tomcat /opt/tomcat
sudo chmod +x /opt/tomcat/bin/*.sh- Activa y arranca Tomcat:
sudo systemctl daemon-reload
sudo systemctl start tomcat
sudo systemctl enable tomcat
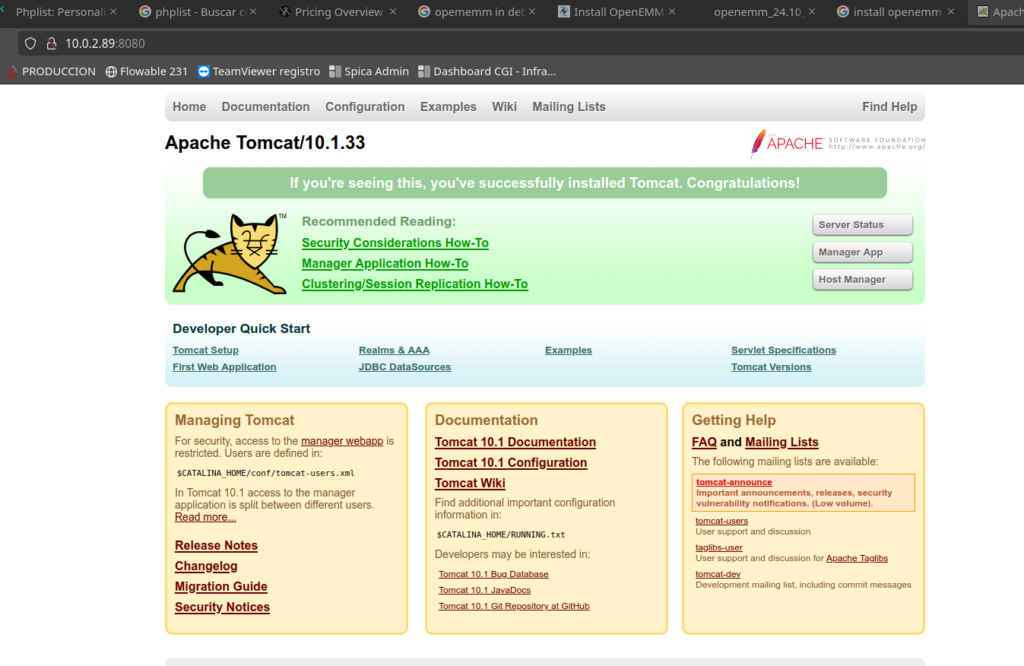
- tenemos tomcat

Instalar MariaDB 10+
sudo nano /etc/apt/sources.list.d/mariadb.sources

# Le agregamos

# MariaDB 11.1 repository list - created 2023-11-20 07:47 UTC
# https://mariadb.org/download/
X-Repolib-Name: MariaDB
Types: deb
# deb.mariadb.org is a dynamic mirror if your preferred mirror goes offline. See https://mariadb.org/mirrorbits/ for details.
# URIs: https://deb.mariadb.org/11.1/debian
URIs: https://mirrors.aliyun.com/mariadb/repo/11.1/debian
Suites: bookworm
Components: main
Signed-By: /etc/apt/keyrings/mariadb-keyring.pgp

# Ejecutamos
sudo apt install apt-transport-https curl
sudo mkdir -p /etc/apt/keyrings
sudo curl -o /etc/apt/keyrings/mariadb-keyring.pgp 'https://mariadb.org/mariadb_release_signing_key.pgp'

# Instalamos
sudo apt update
sudo apt install mariadb-server- Instalamos
sudo apt install software-properties-common -y

sudo apt-key adv --fetch-keys 'https://mariadb.org/mariadb_release_signing_key.asc'

sudo add-apt-repository 'deb [arch=amd64,arm64,ppc64el] https://mirrors.xtom.com/mariadb/repo/10.6/debian bullseye main'

sudo apt update

sudo apt install mariadb-server -y- Asegura la instalación de MariaDB:
sudo mysql_secure_installation- Resultado
NOTE: RUNNING ALL PARTS OF THIS SCRIPT IS RECOMMENDED FOR ALL MariaDB
      SERVERS IN PRODUCTION USE!  PLEASE READ EACH STEP CAREFULLY!

In order to log into MariaDB to secure it, we'll need the current
password for the root user. If you've just installed MariaDB, and
haven't set the root password yet, you should just press enter here.

Enter current password for root (enter for none):
OK, successfully used password, moving on...

Setting the root password or using the unix_socket ensures that nobody
can log into the MariaDB root user without the proper authorisation.

You already have your root account protected, so you can safely answer 'n'.

Switch to unix_socket authentication [Y/n] n
 ... skipping.

You already have your root account protected, so you can safely answer 'n'.

Change the root password? [Y/n] n
 ... skipping.

By default, a MariaDB installation has an anonymous user, allowing anyone
to log into MariaDB without having to have a user account created for
them.  This is intended only for testing, and to make the installation
go a bit smoother.  You should remove them before moving into a
production environment.

Remove anonymous users? [Y/n] Y
 ... Success!

Normally, root should only be allowed to connect from 'localhost'.  This
ensures that someone cannot guess at the root password from the network.

Disallow root login remotely? [Y/n]
 ... Success!

By default, MariaDB comes with a database named 'test' that anyone can
access.  This is also intended only for testing, and should be removed
before moving into a production environment.

Remove test database and access to it? [Y/n]
 - Dropping test database...
 ... Success!
 - Removing privileges on test database...
 ... Success!

Reloading the privilege tables will ensure that all changes made so far
will take effect immediately.

Reload privilege tables now? [Y/n]
 ... Success!

Cleaning up...

All done!  If you've completed all of the above steps, your MariaDB
installation should now be secure.

Thanks for using MariaDB!- Ingresamos a mysql
mysql -u root -p- Creamos la bd
CREATE DATABASE openemm CHARACTER SET utf8 COLLATE utf8_general_ci;
CREATE USER 'openemm'@'localhost' IDENTIFIED BY 'openemm123';
GRANT ALL PRIVILEGES ON openemm.* TO 'openemm'@'localhost';
FLUSH PRIVILEGES;
Instalar Python 3.8
- instalamos
sudo apt install python3.11 python3.11-venv python3.11-dev -y
python3.11 --version
Instalar y configurar Postfix
- Instalamos
sudo apt install postfix -y
sudo apt-get install mailutils- Configurar
sudo nano /etc/postfix/main.cf- chat
myhostname = mail.tu-dominio.com
mydomain = tu-dominio.com
myorigin = $mydomain
inet_interfaces = all
inet_protocols = ipv4
- oscar
# See /usr/share/postfix/main.cf.dist for a commented, more complete version


# Debian specific:  Specifying a file name will cause the first
# line of that file to be used as the name.  The Debian default
# is /etc/mailname.
#myorigin = /etc/mailname

smtpd_banner = $myhostname ESMTP $mail_name (Debian/GNU)
biff = no

# appending .domain is the MUA's job.
append_dot_mydomain = no

# Uncomment the next line to generate "delayed mail" warnings
#delay_warning_time = 4h

readme_directory = no

# See http://www.postfix.org/COMPATIBILITY_README.html -- default to 3.6 on
# fresh installs.
compatibility_level = 3.6

# TLS parameters
smtpd_tls_cert_file=/etc/ssl/certs/ssl-cert-snakeoil.pem
smtpd_tls_key_file=/etc/ssl/private/ssl-cert-snakeoil.key
smtpd_tls_security_level=may

smtp_tls_CApath=/etc/ssl/certs
smtp_tls_security_level=may
smtp_tls_session_cache_database = btree:${data_directory}/smtp_scache


smtpd_relay_restrictions = permit_mynetworks permit_sasl_authenticated defer_unauth_destination
myhostname = openemm
alias_maps = hash:/etc/aliases
alias_database = hash:/etc/aliases
mydestination = $myhostname, openemm, localhost.localdomain, localhost
relayhost = mail.una.ac.cr
mynetworks = 127.0.0.0/8 [::ffff:127.0.0.0]/104 [::1]/128
mailbox_size_limit = 0
recipient_delimiter = +
inet_interfaces = loopback-only
inet_protocols = all
- Reiniciar
sudo systemctl restart postfix- probar
echo "Esto es una prueba de Postfix open" | mail -s "Prueba de Postfix open" gustavo.matamoros@gmail.com
OpenEMM
- instalamos
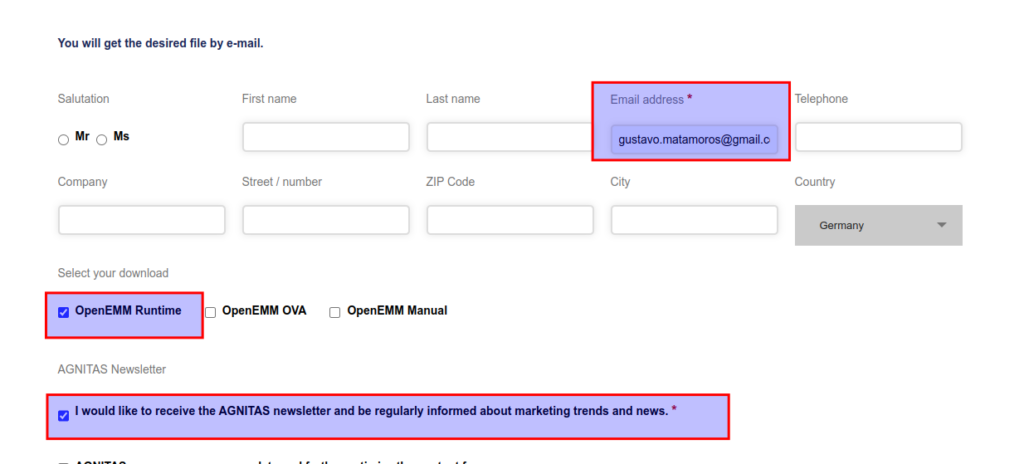
- Para descarghar lo tenemos que hacerlo en esta pagina
- https://www.agnitas.de/en/openemm-downloads/
- Se registra y se marca rumtime

- llega un correo con el enlace de descarga
- En la compu donde descargamos
scp openemm-runtime-24.04.000.098.tar.gz cgi@10.0.2.89:/tmp- en el servidor
cd /tmp

mkdir openemm
tar -xvzf openemm-runtime-24.04.000.098.tar.gz -C openemm

sudo mv /tmp/openemm/* /opt/openemm
instalamos el conector de mysql
/usr/bin/python3 -m pip install mysql-connector-python --break-system-packages

# Crear entorno virtual
python3 -m venv myenv

#Activar el entorno virtual:
source myenv/bin/activate

#Instalar el paquete dentro del entorno virtual:
pip install mysql-connector-python

#Verificar que el paquete está disponible:
python -c "import mysql.connector; print('Conexión exitosa')"- Instalar dependencia
sudo apt install rpm make zip sudo wget apt-transport-https curl gcc g++

sudo apt update
sudo apt install gawk gcc g++ libbz2-dev libdb-dev libffi-dev libxml2-dev libnsl-dev libssl-dev uuid-dev make libncurses-dev libreadline-dev sqlite3 libtar-dev xz-utils zlib1g-dev wget

apt install openssl \    build-essential \    curl \    gcc \    libbz2-dev \    libev-dev \    libffi-dev \    libgdbm-dev \    liblzma-dev \    libncurses-dev \    libreadline-dev \    libsqlite3-dev \    libssl-dev \    make \    tk-dev \    wget \    git \    zlib1g-dev
apt install rsyslog
systemctl start rsyslog
systemctl enable rsyslog

sudo apt install libboost-all-dev libaio1 ncurses-base wget

#*********************
#python3: https://linuxhostsupport.com/blog/how-to-install-python-on-debian-12/
#*********************

python3 -m pip install mariadb


cd /tmp
wget https://www.python.org/ftp/python/3.12.3/Python-3.12.3.tgz
tar zxf Python-3.12.3.tgz
cd Python-3.12.3
./configure --prefix=/usr/local
make
make install
usuario openemm
groupadd openemm
useradd -m -g openemm -d /home/openemm -s /bin/bash openemm
passwd openemm
su - openemm- Abrimos
sudo nano /etc/skel/.profile- Agregamos al final del archivo
export PATH=$PATH:/usr/sbin- Instalamos
cd /opt/openemm/bin/
- Abrimos el archivo de configuración
sudo nano /opt/openemm/conf/emm.properties