sudo systemctl start mysql
sudo systemctl enable mysql
sudo systemctl status mysql
Asegurar la BD
sudo mysql_secure_installation
Resultado
NOTE: RUNNING ALL PARTS OF THIS SCRIPT IS RECOMMENDED FOR ALL MariaDB
      SERVERS IN PRODUCTION USE!  PLEASE READ EACH STEP CAREFULLY!

In order to log into MariaDB to secure it, we'll need the current
password for the root user. If you've just installed MariaDB, and
haven't set the root password yet, you should just press enter here.

Enter current password for root (enter for none):
OK, successfully used password, moving on...

Setting the root password or using the unix_socket ensures that nobody
can log into the MariaDB root user without the proper authorisation.

You already have your root account protected, so you can safely answer 'n'.

Switch to unix_socket authentication [Y/n]
Enabled successfully!
Reloading privilege tables..
 ... Success!


You already have your root account protected, so you can safely answer 'n'.

Change the root password? [Y/n] n
 ... skipping.

By default, a MariaDB installation has an anonymous user, allowing anyone
to log into MariaDB without having to have a user account created for
them.  This is intended only for testing, and to make the installation
go a bit smoother.  You should remove them before moving into a
production environment.

Remove anonymous users? [Y/n] Y
 ... Success!

Normally, root should only be allowed to connect from 'localhost'.  This
ensures that someone cannot guess at the root password from the network.

Disallow root login remotely? [Y/n] Y
 ... Success!

By default, MariaDB comes with a database named 'test' that anyone can
access.  This is also intended only for testing, and should be removed
before moving into a production environment.

Remove test database and access to it? [Y/n] Y
 - Dropping test database...
 ... Success!
 - Removing privileges on test database...
 ... Success!

Reloading the privilege tables will ensure that all changes made so far
will take effect immediately.

Reload privilege tables now? [Y/n] Y
 ... Success!

Cleaning up...

All done!  If you've completed all of the above steps, your MariaDB
installation should now be secure.

Thanks for using MariaDB!
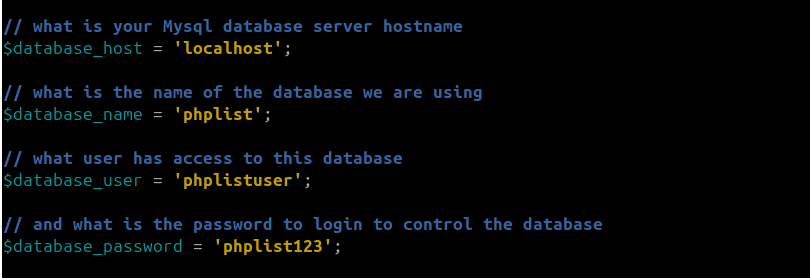
Crear una base de datos para phpList
sudo mysql -u root -p (ENTER)

CREATE DATABASE phplist CHARACTER SET utf8mb4 COLLATE utf8mb4_general_ci;

CREATE USER 'phplistuser'@'localhost' IDENTIFIED BY 'phplistuser123';

GRANT ALL PRIVILEGES ON phplist.* TO 'phplistuser'@'localhost';

FLUSH PRIVILEGES;
EXIT;
acceso remoto
sudo nano /etc/mysql/mariadb.conf.d/50-server.cnf
Y modificar
bind-address            = 127.0.0.1
X
bind-address            = 0.0.0.0
otorgar permisos al usuario para conectarse desde cualquier host:
sudo mysql -u root -p

GRANT ALL PRIVILEGES ON phplist.* TO 'phplistuser'@'%' IDENTIFIED BY 'phplistuser123';

FLUSH PRIVILEGES;
reinicamos
sudo systemctl restart mariadb
sudo systemctl status mariadb
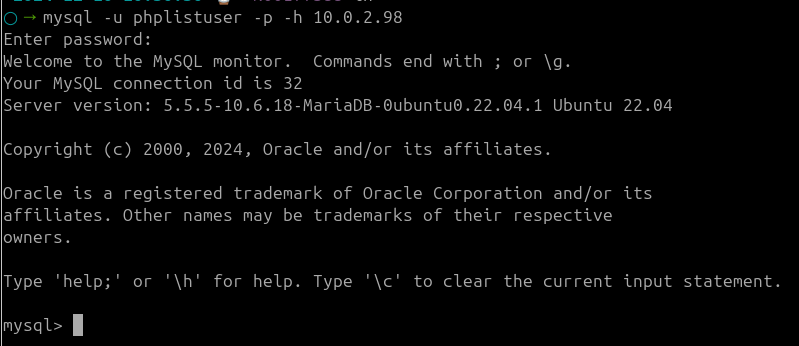
Ahora desde otra maquina podemos probar la conexion
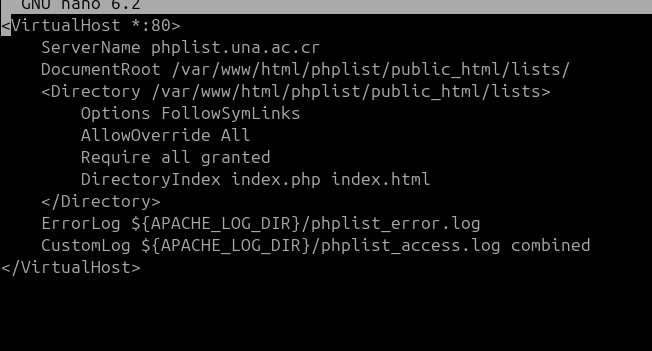
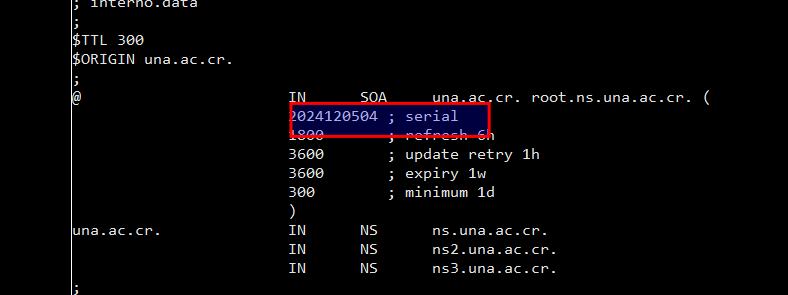
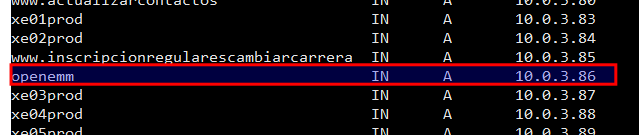
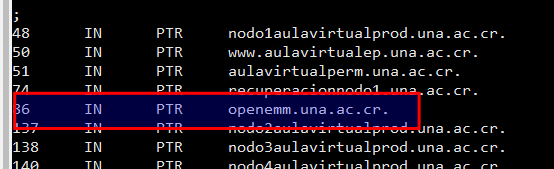
y agregamos o modificamos la ip y dominio requerido
NOTA: recuerde que termina en punto .
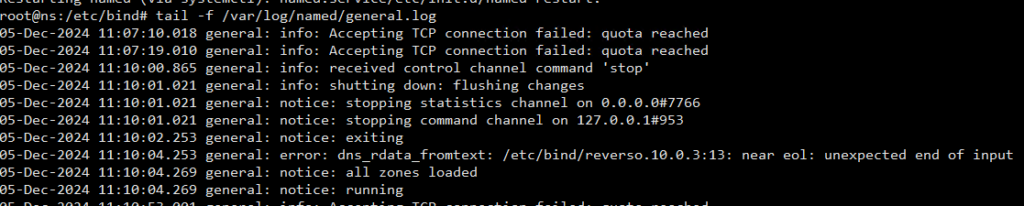
reinicamos el servicio
/etc/init.d/named restart
y revisamos la cola
tail -f /var/log/named/general.log
Resultado
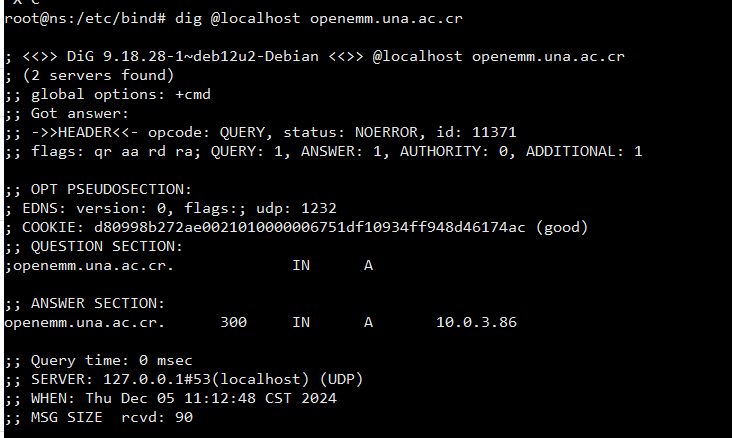
ahora debemo probar que resulva el dominio y el reverso
podemos hacerlo con
dig @localhost phplist.una.ac.cr
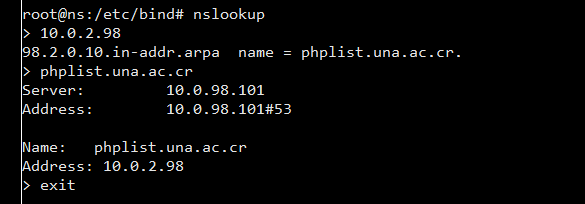
o de forma individual pero solo sirve dentro de propio dns
nslookup -> ENTER
(ip) 10.0.2.98 -> ENTER
(dominio) openemm.una.ac.cr

exit
Configuración de hora
Si ejecutamos
timedatectl
Retorna
               Local time: mar 2025-01-21 17:09:53 UTC
           Universal time: mar 2025-01-21 17:09:53 UTC
                 RTC time: mar 2025-01-21 17:09:53
                Time zone: Etc/UTC (UTC, +0000)
System clock synchronized: yes
              NTP service: active
          RTC in local TZ: no
Esta incorreto ejecutamos
sudo timedatectl set-timezone America/Costa_Rica
configuraciones de PHP.ini
abrimos el archivo
sudo nano /etc/php/8.1/apache2/php.ini
buscamos
;date.timezone =
Y lo modificamos por
date.timezone = "America/Costa_Rica"
Adjuntos
upload_max_filesize = 64M
post_max_size = 64M
Tiempo de ejecución de scripts
max_execution_time = 300
memory_limit = 256M
Para cuando se importan listas grandes de correos
max_input_vars = 5000
para utilizar sendmail
sendmail_path = /usr/sbin/sendmail -t -i
con este comando podemos ver la ruta del sendmail
which sendmail
habilitar los logs de error pero ocultar los errores para evitar poner información sensible
error_reporting = E_ALL & ~E_NOTICE & ~E_STRICT & ~E_DEPRECATED
log_errors = On
error_log = /var/log/phplist_errors.log
display_errors = Off